Sunday, March 08, 2015

Carving the Dragon Continued


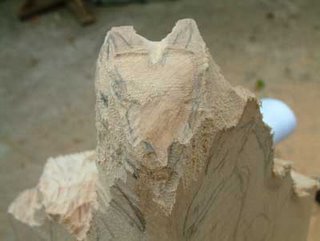
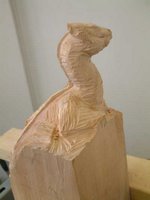
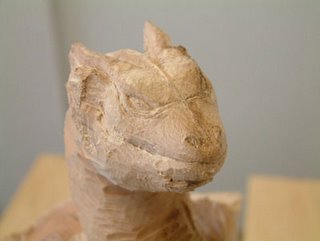
Once I had carved a rough shape of the head I then started to form the shape of the rest of the body. I didn't want to refine the carving too much at this stage until I had ensured there was enough wood to carve the dragon from and I had got the sizing correct.


By carving the entire dragon roughly first I felt there was still enough wood left on the top of the dragon and therefore the option of reducing the total size of the dragon if I felt I needed to.


With the rough shape of the entire dragon carved I then concentrated on refining the bottom part of the dragon a little more.


I was intending to try and make the dragon look like it was sitting on a tree stump with its tail draped down the back. Carving the tail wasn't too much of a problem but I found the back legs tricky since it was hard carving the holes under the dragon in such a confined space.

Tuesday, January 03, 2006

Carving the Dragon

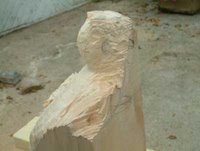
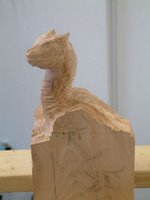
I first tried to ensure I had the slope of the back of the dragon right and that the dragons proportions would fit in the block of wood. I also left a section of wood running down the back that I intended to carve spines from at a later date.


I then started carving the rough shape and position of the back and front leg on the right side of its body, whilst leaving my pencil drawing the other side.


I didn’t want to carve too much detail at this stage but was concentrating more on getting the positioning right.


I had also refined the shape of the head although I left the bottom jaw fairly thick at this stage so that I could make more refinements if needed. I was really pleased with how the eyes had turned out and could really imagine what the head would look like when it was finished.

Thursday, December 15, 2005

Initial Carving Stage

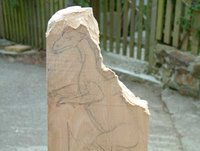
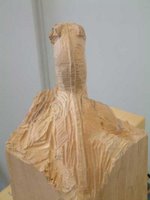
I started of with a block of Lime about 6" (150 mm) wide by 16" (400 mm) height by 4" (100mm) thick. At this stage you can see I had already drawn in the rough shape of the head and body on the side of the block with a pencil.


I then carved out the rough shape for the top of the head and back of the body. I wanted to make sure I had got the proportions correct before carving any fine details.


As I carved the head down I kept redrawing the dragon, adding more detail to try and ensure that the eyes would end up in the right place.


I found it quite frightening at this stage and I did begin to wonder if it was ever going to look like the dragon I had envisaged. I was starting to see the head emerging though and that gave me the encouragement to continue.

Tuesday, December 06, 2005

Craft to Wood Art


For the first couple of years I went to lots of craft shows and continued making just craft work but even at that stage people would say my platters were too good to use and would buy them for display purposes only. This combined with a demonstration I saw on barley twists really inspired me and for the first time I released the true potential of the wonderful medium of wood.

I could use the skills I had learned at woodturning to create art in wood.

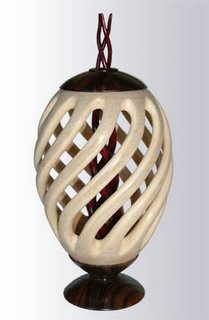
From then on I started teaching myself how to master all types of barley twist and bind work before trying to incorporate them into new artistic pieces. To my surprise I also discovered my maths actually helped, since if I carved the binds so that they were mathematically correct they would therefore look ascetically pleasing to the eye. With these skills I started producing Bind Vases, the binds of which I carved with a double curvature.

The picture above is of one of my slightly later Bind Vases that also features a triple open barley twist up through the centre of it.

The bind vases were just the start though and I realised that there was now a whole new area I could be exploring of wood art. There were other enhancement techniques I had heard about and what’s more I had ideas for much more complex and intricate artistic pieces.

Monday, December 05, 2005

Dragon Sculpture

Although I am a professional woodturner, I have slowly incorporated more and more woodcarving into each piece and finally decided to carve a snake as part of one of my sculptural forms called Guardian.

Despite the fact that not everyone likes snakes and I had actually managed to scare one or two people with the realism of the snake’s eyes, I still got a lot of positive feedback about the piece. People seemed to really like the fact that I had combined woodturning and woodcarving to produce something really different.

I hadn’t known anything about woodcarving when I had started carving the snake but after a lot of trial and error I was really satisfied with the results and encouraged to try something more challenging. My new idea for a sculptural piece incorporated a dragon about to take flight.

I will keep updating this category with pictures charting the progress of the dragon and what it looked like at each stage of the project.

Saturday, December 03, 2005

Dragon Wood Sculpture

Dragon Sculpture – About my latest woodcarving piece.
Initial Carving Stage – Pictures of the initial carving of the dragon.
Carving the Dragon – Pictures of the dragon after more shaping.
Carving the Dragon - Continued – Pictures of the dragon after more carving.

Thursday, December 01, 2005

Past Woodturning Experiences

Beginnings in Woodturning - How I first discovered woodturning.
Learning to Turn - How I learnt the basics of woodturning.
First Craft Show - How I went about trying to sell my work.
Craft to Wood Art - How my work changed from craft work to artistic pieces.